Wednesday, March 22, 2023

Cheyenne's Room Gets A Delightful Dose of Pink Paint


Hello there friends! I'm trying to do better and post about  the projects that I've completed. This one is recent and is just a quick paint refresh, but I absolutely love it! The paint color is Benjamin Moore Pink Starburst. It picks up beautifully on the pink in the Pierre Frey wallpaper in the dormer nook of the room(see pics below). No long narrative needed as it's quite a straightforward project, so let's look at a few before pics and then delve into the after pics. 

Before- these colors are also present in the Pierre Frey wallpaper and were delightful, but as you know, wall colors are dynamic around here:-). 

This is after I applied in the first coat and was admiring how lovely the color went with the yellow. I toyed with the idea of just painting that one wall, but stuck to the original plan and painted the entire room.

Almost done here and Cheyenne is giving me a thumbs up! Great job Mama!;-)


And here we have some after shots. Pretty, pretty!


This dresser is one of my favorite pieces as I bought it when Zion was a baby from the now Crate and Kids. They were Land of Nod then. All 3 children have used it.  That lamp is a most recent thrift score and of course, I've mentioned that thrifted rocking chair before. And a disco ball is a must! Rug is from Suhki rugs.


Colorful toddler bedroom with pink walls-designaddictmom


One of her favorite spots in the room

The Arty Pierre Frey wallpaper that I mentioned above. I moved this couch from another room and placed it in the nook. It fits perfectly and now we have another spot to lounge. I also removed the legs.

So, what do you think of this new color? xx


After pics- Kate Rangel Photo

Labels: , , , , , ,

Tuesday, April 5, 2022

Some Tips For Painting Doors Like A Pro


Colorful painted doors graphic-designaddictmom
I have been asked a number of times for tips regarding painting doors so I have compiled some basic ones in this post. Painting a door a color is a quick and easy way to add some interest to a space. I might need an intervention since I am obsessed with  painting all the doors:-).

Painted closet doors-designaddictmom


Tips For Painting Your Doors Like A Pro:

_
It’s ideal to remove the door(s) from the hinges prior to painting but not a must. If it’s warm out, I’ll remove the door, otherwise I paint it in place. If you remove the doors, be sure to store the hinges etc. in a safe place so you can readily find them when you need to replace the doors. I like to place those hardware in a Ziploc storage bag.

Pink painted door-designaddictmom


 If there are any holes in the door, be sure to fill in with spackle, let dry, then sand. Also it’s a great idea to remove the knobs(I don’t always do this though). 

Check to see what type of paint your door was previously painted. Dampen a microfiber cloth/rag with rubbing alcohol and rub it against the door, if paint transfers to the rag, it’s been painted with a latex-based product and priming won’t be necessary. If nothing comes off on the rag, you’re likely dealing with oil-based paint—and if you hope to use a newer, latex formula, you’ll need to prime first. However, if you’re using a product like Benjamin Moore Advanced paint line, you can forego the priming step as it readily adheres smoothly over both latex and oil based paint.

Mint green painted door-designaddictmom


For the finish- A satin or semi-gloss works well.

xx


Labels: , , , , ,

Thursday, January 20, 2022

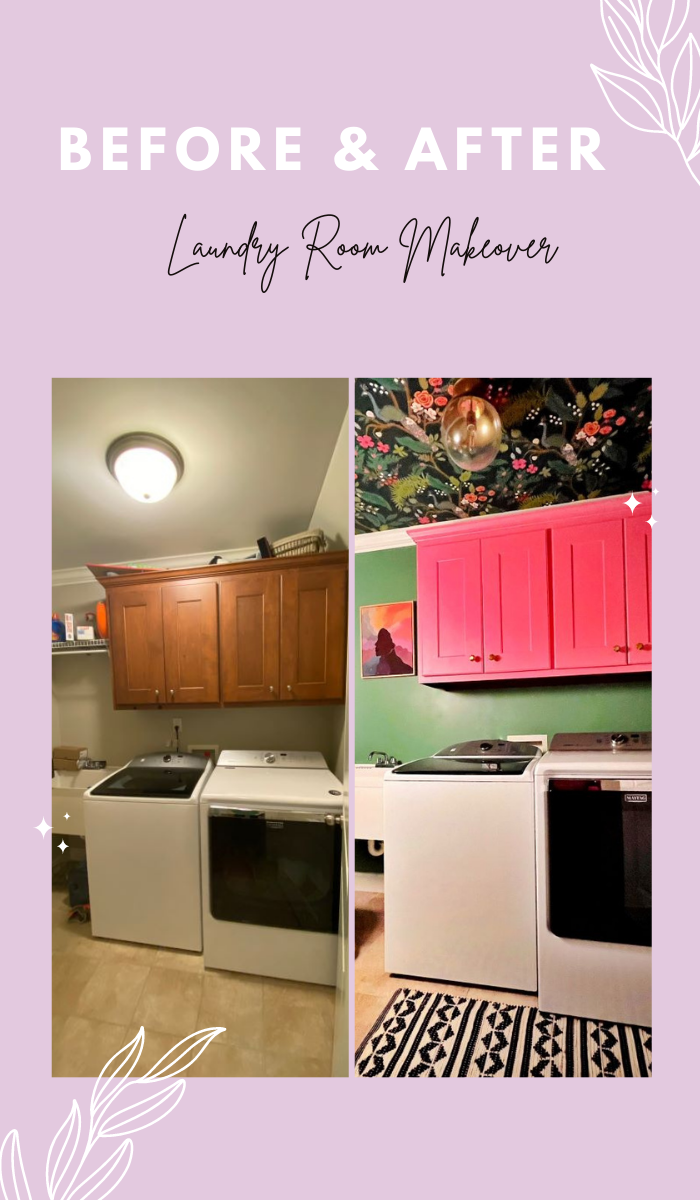
Our Windowless Laundry Room Gets A Nice Dose of Color and Pattern - Before and After Edition

Laundry room graphic showing before and after-designaddictmom


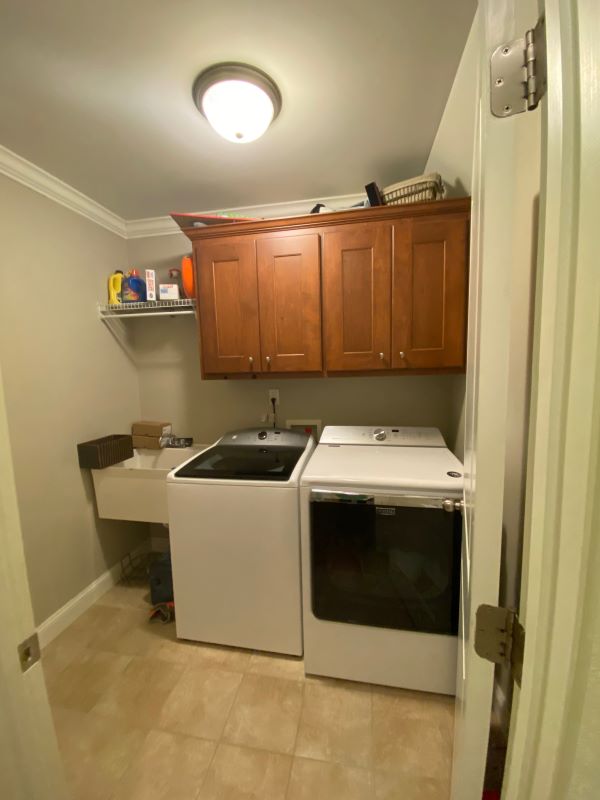
I am excited to share our laundry room update with you. I actually completed most of this project last year, but didn't get around to doing some minor detail work on it to get it close to the finish line until this week. There are no windows in this space, thus it's dark and was really not the kind of "sunshiney" space I love. Well adding windows wasn't an option, so I added sunshine in the form of colors and patterns. Let's take a look at what I did:
                                                                         

Laundry room-before
laundry room before

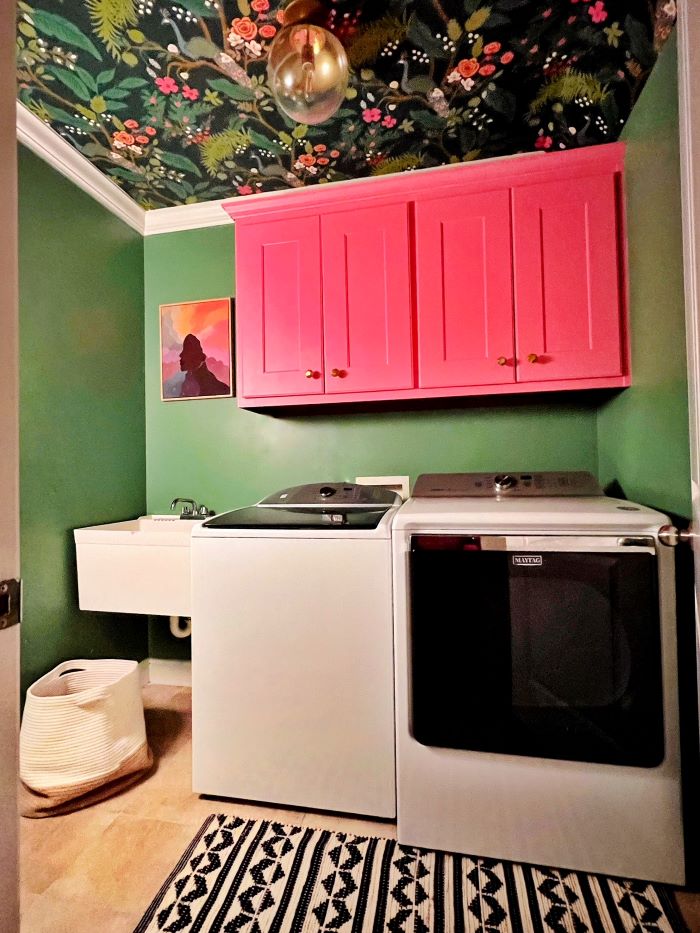
Laundry room update-designaddictmom
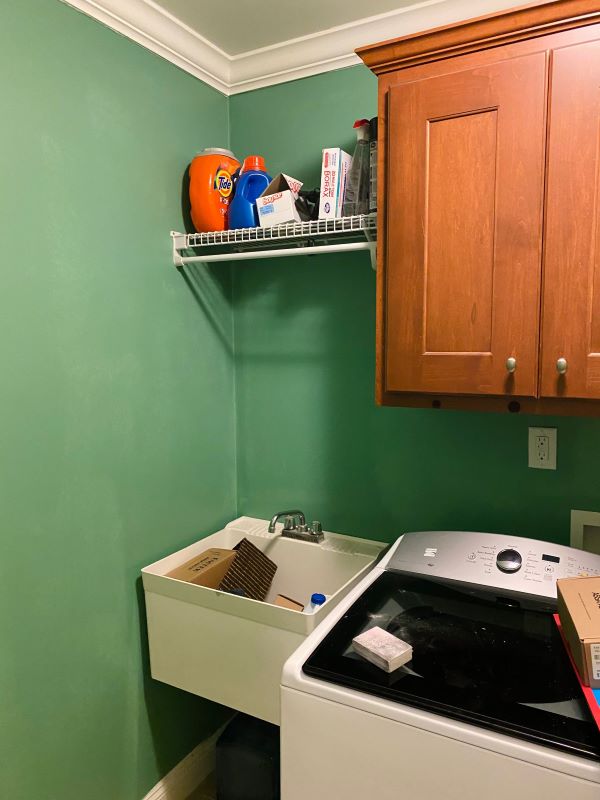
I painted the walls a lovely green; Benjamin Moore Clearspring Green. 
Our Windowless Laundry Room Gets A Nice Dose of Color and Pattern-Before and After Edition


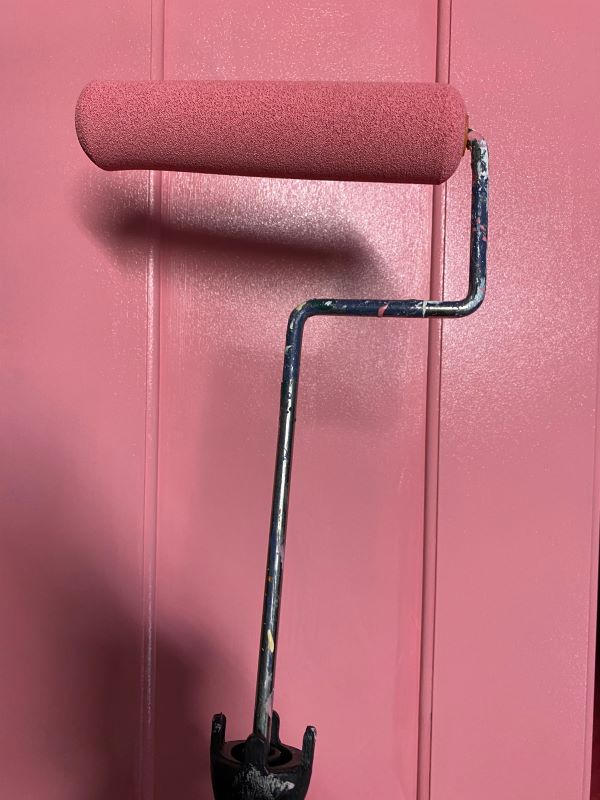
I removed the cabinet fronts and painted those in Benjamin Moore Autumn Red.

Laundry room update-working progress


Ceiling before

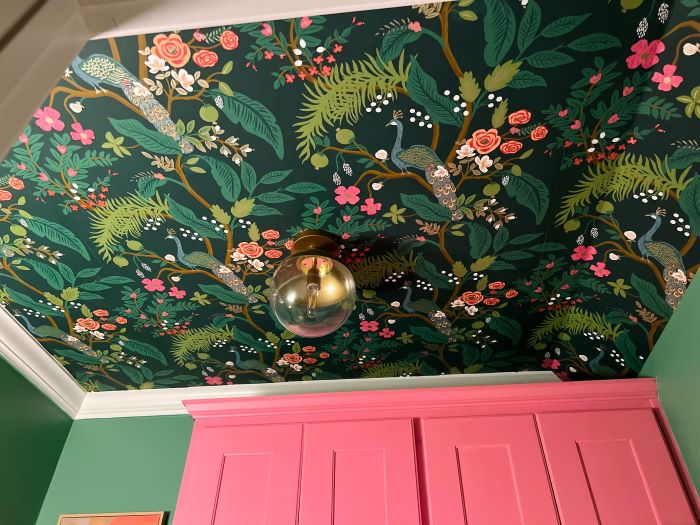
I had an electrician replace the boob light and had the ceiling wallpapered.

Wallpapered ceiling in laundry room-designaddictmom

Now, I can't stop looking up! The wallpaper is this one from Anthropologie. 


Our Windowless Laundry Room Gets A Nice Dose of Color and Pattern-Before and After Edition
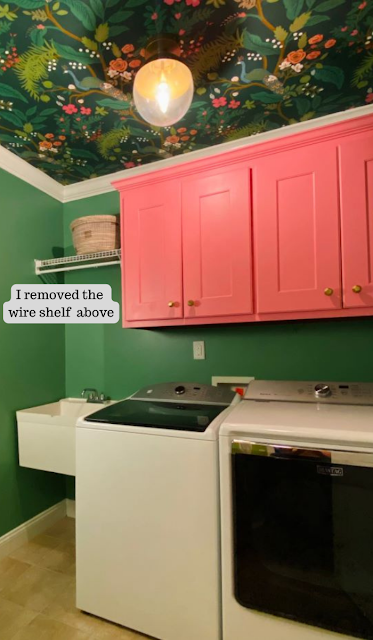
This week, I finally got around to filling in the holes and repainting after removing the
 wire shelf.

Our Windowless Laundry Room Gets A Nice Dose of Color and Pattern-Before and After Edition
I replaced it with that lovely piece of art from Mikenzi Jones. I also shared a quick video reel tour on IG, here. I'll update the post once I reshoot the space during the daytime with my camera. Do you favorite feature from this project. I know the wallpapered ceiling has been a crowd fave. Also, I'll update the post once I reshoot the space during the daytime with my camera as most of these pics were snapped late evening with my phone. xx


*This post contains an affiliate link

Labels: , , , , ,

Friday, October 15, 2021

Our Porch Refresh: The Power Of Paint

 The post is sponsored by HGTV Home® by Sherwin Williams but all opinions are my own

Our Porch Refresh: The Power Of Paint-designaddictmom


Our screened in porch got little use this Summer and that is a rarity! We were traveling for a bit  and when we weren't traveling, you could find me puttering in my outdoor garden. The screened in porch had become more of a walk through and was quite a dismal sight.

Our Porch Refresh: The Power Of Paint-before pic-designaddictmom

 Since the porch wasn’t in use, it had become neglected and it showed. It was screaming for a refresh and some tlc. I thought well now that it’s Fall, maybe it’s time to show the screened in porch some tlc with a quick refresh! And what better way to do that than with paint! You know how much I embrace the power of paint and the main feature of this transformation is all about the Power Of Paint. 

Our Porch Refresh: The Power Of Paint-paint choices from HGTV Home by SW

Naturally the color scheme was going to be bold and to narrow down my choices I set out to Lowes to peruse the HGTV Home by Sherwin Williams Collections that are available exclusively at Lowes. After looking at the color cards for the different collections, I settled on the Softer Side Collection for my main color choices.


Our Porch Refresh: The Power Of Paint-mood board-designaddictmom


Above is a mood board of sorts with all the HGTV Home® by Sherwin Williams colors I chose for the project and pictured is one of my inspo pics. In addition to painting, I also planned on doing something fun with the floors using this stencil in the large 12 x 12 size also pictured on the mood board. This was going to be A LOT of painting and maybe not such a quick refresh after all!

Our Porch Refresh: The Power Of Paint-before pic

This is a before pic of the porch after almost everything was cleared out. After removing everything, it was time to prep the space for painting. The porch was swept and cleaned before painting. 

Our Porch Refresh: The Power Of Paint-wall color choice-designaddictmom

For the walls as mentioned above, I opted for the Memorable Rose (HGSW 2045). However, unlike before, I decided to bathe not only the ceiling and the walls, but also the trim in the same color. Here is a look at the process:


Our Porch Refresh: The Power Of Paint-painting process-designaddictmom

The walls were lightly sanded prior to painting and some areas needed some putty applied to even and smooth out the surfaces, then more sanding before painting. 

Our Porch Refresh: The Power Of Paint-painting process-designaddictmom

Since the porch was painted a saturated purple, and not a neutral color,  it took two coats of paint to cover it.  As usual, be sure to allow the paint to dry between coats.


AFTER PAINTING


Our Porch Refresh: The Power Of Paint-after painting-designaddictmom

Our Porch Refresh: The Power Of Paint-after painting-designaddictmom


Our Porch Refresh: The Power Of Paint-beforeandafter-designaddictmom

Our Porch Refresh: The Power Of Paint-painted door-designaddictmom

I also added a pop of zest to the space with the color Frolic (HGSW 1235) from the HGTV Home by Sherwin Williams Vintage Finds Collection. In addition, the floors were prepped and base porch paint applied before starting the stenciling process using the color Black Magic (HGSW 6991) from the HGTV Home® by Sherwin Williams Soft Side Collection.

Our Porch Refresh: The Power Of Paint-floor stenciling in progress-designaddictmom

Thank goodness the hubby was around for this project as he tackled the stencil application on the floor. It took him about half a day to complete the stenciling. Below is a peek at how it all came together.

Our Porch Refresh: The Power Of Paint-porch after-#porch #color-designaddictmom

Our Porch Refresh: The Power Of Paint-porch after-#porch #color #stenciledfloor-designaddictmom

Our Porch Refresh: The Power Of Paint-#plants #porch-designaddictmom

This planterific corner that I carved out on the porch is so welcoming and we love spending time out here! It’s hard to believe this was the same space.


Our Porch Refresh: The Power Of Paint- #fall #candles #porch-designaddictmom

Our Porch Refresh: The Power Of Paint-designaddictmom

We waited for  two days for the floor to fully cure before placing any furniture on it. And now the porch is back in business and is getting lots of use. I love these pretty colors together which are available in the HGTV Home® by Sherwin-Williams collection that is found exclusively at Lowes. xx


Labels: , , , , , , ,

Wednesday, October 13, 2021

Our Halloween Monster Door-2021 Edition


Halloween Front Porch Inspiration: Our 2021 Monster Door Edition-designaddictmom
If you're a longtime reader, you know I've been doing a Monster door for Halloween for years now. As usual, we had to include our painted pumpkins and even added a few Squid Game inspired ones. Below are the items I use to create the Monster door and I've also linked on my Amazon store.

Create Your Own Monster Door


How To Create Your Own Monster Door-design addictmom


Halloween Front Porch Inspiration: Our 2021 Monster Door Edition-designaddictmom

Halloween Front Porch Inspiration: Our 2021 Monster Door Edition-designaddictmom

I seal all my pumpkins(even the unpainted ones) as it helps prevent disintegration and protect them from the elements.  My pumpkins are usually still in tact even in December! This Mod Podge sealant is great!


Halloween Front Porch Inspiration: Our 2021 Monster Door Edition-designaddictmom


Halloween Inspiration: Our 2021 Monster Door Edition-designaddictmom

 And that cute lil butterfly addition this year  is undoubtedly stealing the show:-). I've linked to most of the products used on my Amazon store including Cheyenne's cute butterfly costume.(affiliate link)

Our Halloween Monster Door -2021 Edition- designaddictmom

xx
 

* This post contains affiliate links.

Labels: , , , ,